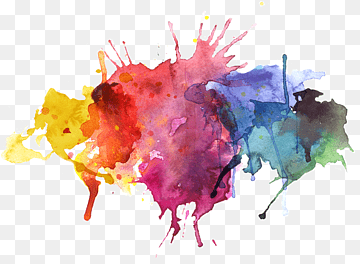
Watercolor painting is one of the most expressive and versatile forms of artistic expression. Among the many techniques, the watercolor splash is a favorite among artists due to its spontaneous, fluid, and dynamic nature. Whether you’re an experienced artist or just beginning your creative journey, understanding how to create a watercolor splash effect can add depth and energy to your artwork. In this comprehensive guide, we’ll explore everything about watercolor splashes, from essential materials to advanced techniques. Let’s dive in!\
Why Use Watercolor Splash Techniques?
1. Adds a Sense of Freedom and Movement
One of the main reasons artists love the watercolor splash technique is that it creates a sense of spontaneity. The uncontrolled flow of color across the paper produces unique results every time, making each artwork a one-of-a-kind masterpiece.
2. Enhances Backgrounds and Abstract Art
If you want to create an abstract or dreamy background, the watercolor splash technique is an excellent choice. It allows you to experiment with different color combinations and organic shapes that can make your paintings more engaging.
3. Boosts Creativity and Experimentation
Since there is no rigid structure to a watercolor splash, it encourages creativity. You can experiment with different tools, colors, and layering techniques to achieve incredible effects that you might not have planned.
Essential Materials for Watercolor Splash Art
Before diving into the technique, it’s crucial to gather the right materials. Here’s what you’ll need:
1. Watercolor Paints
High-quality watercolor paints offer the best pigmentation and fluidity. You can choose between tube paints and pan sets, depending on your preference.

2. Watercolor Paper
A thick, absorbent watercolor paper (ideally 140lb or heavier) is necessary to handle the wetness of splash techniques. Cold-pressed or rough-textured paper works best for organic textures.
3. Brushes and Other Tools
- Round Brushes: Great for controlled splashes.
- Flat Brushes: Perfect for larger, sweeping splashes.
- Spray Bottles: Used to mist water onto paper or blend colors smoothly.
- Straws: Blowing air through a straw can spread paint in interesting patterns.
- Palette or Mixing Tray: Helps in mixing colors before application.
4. Water and Towels
You’ll need water for dilution and cleaning, along with towels or tissues to lift excess moisture and control the splash effect.
Step-by-Step Guide to Creating a Watercolor Splash
Step 1: Preparing Your Workspace
Set up a flat, clean surface with all your materials within reach. Protect your workspace with a plastic sheet or newspaper to avoid unwanted stains.
Step 2: Choosing Colors and Mixing Paints
Select a color palette that suits your vision. Mix your paints with enough water to achieve a fluid consistency without being too diluted.
Step 3: Wetting the Paper (Optional)
If you want a soft blend, lightly wet the paper with clean water using a brush or spray bottle. This helps the paint spread naturally.
Step 4: Creating the Splash Effect
There are several methods to create a watercolor splash:
- Flicking the Brush: Load a brush with paint and flick it over the paper for fine splashes.
- Blowing Through a Straw: Drop paint on the paper and blow through a straw to spread it.
- Dropping Paint from a Height: Hold the brush a few inches above the paper and let the paint drip for organic splashes.
- Using a Spray Bottle: Mist water over wet paint for a splattered effect.
Step 5: Layering and Blending
Once the first layer is dry, add additional splashes of different colors to create depth. Experiment with blending techniques by allowing wet layers to mix or using a dry brush to soften edges.
Step 6: Final Touches and Drying
Let the painting dry naturally or use a hairdryer to speed up the process. You can add details with ink, markers, or additional watercolor layers.
Advanced Watercolor Splash Techniques
1. Using Salt for Texture
Sprinkle salt on a wet watercolor splash to create a unique, crystalline texture. The salt absorbs the pigment, leaving behind interesting patterns.
2. Alcohol Droplet Effect
Adding a few drops of rubbing alcohol on wet paint creates stunning, organic circular textures that enhance the fluidity of the splash.
3. Layering Transparent Colors
To add depth and dimension, apply multiple layers of splashes, letting each one dry before adding the next.
4. Combining with Other Art Mediums
Try mixing watercolor splashes with ink, acrylic, or digital art to create mixed-media masterpieces.
Common Mistakes and How to Avoid Them
1. Using Too Much Water
Excessive water can cause the paper to warp or make colors look washed out. Use a controlled amount to maintain vibrancy.
2. Overworking the Splash
Trying to control the splash effect too much can take away its organic feel. Let the paint flow naturally and embrace happy accidents.
3. Not Letting Layers Dry
If you apply a new splash before the previous layer is dry, colors might muddy instead of layering beautifully. Always allow sufficient drying time between layers.
Creative Ideas for Watercolor Splash Artwork
1. Abstract Backgrounds for Calligraphy
Create a vibrant splash background and layer elegant calligraphy over it for a stunning piece.
2. Watercolor Splash Animals
Use controlled splashes to form animal silhouettes, letting the paint naturally define the shapes.
3. Cosmic and Galaxy Art
Blend deep blues, purples, and blacks with splattered white paint to create a mesmerizing galaxy effect.
4. Greeting Cards and Stationery
Incorporate watercolor splashes into DIY cards, invitations, or bookmarks for a personalized artistic touch.
Final Thoughts
The watercolor splash technique is a fun and expressive way to create dynamic artwork. Whether you’re making bold abstract pieces, textured backgrounds, or enhancing illustrations, this technique allows endless possibilities. By understanding the materials, methods, and creative applications, you can master watercolor splashes and elevate your artistic skills.

